Article
Naturally Dyed Eggs
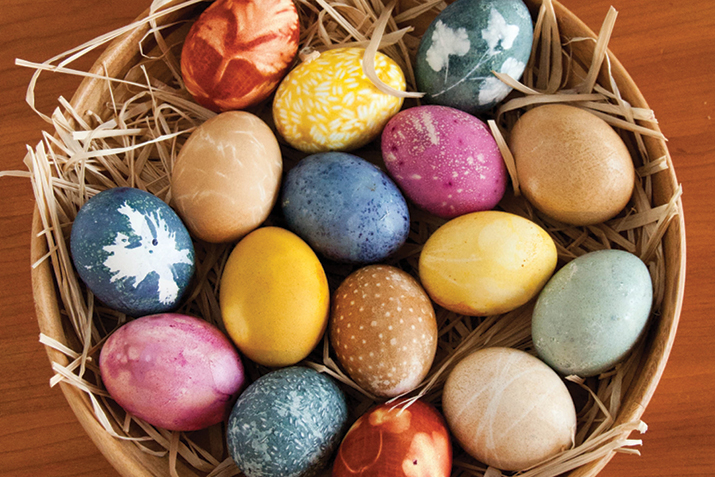
Egg dyeing is a fun way to celebrate this time of year—and it's a tradition that goes way back—as much as 5,000 years when Persians celebrated springtime with eggs colored with plant-based dyes. Plant dyes can be just as useful today and they're plentiful; in fact you very well might have dye-worthy ingredients in your kitchen already.
Here are some great plant-based dyes—fruits, vegetables, spices and flowers.

Items Needed
White eggs (or try brown, keeping in mind color results will vary), egg carton, stock pan(s), water, white vinegar, slotted spoon and natural materials for dyeing (see table).
Optional: Tape, string, rubber bands, cheese cloth squares, natural beeswax crayons to create designs on eggs, and vegetable oil for an extra sheen.
Directions
Hot Bath Method
-
Place uncooked eggs in a stainless steel stock pan. Add water 2-3 inches above eggs. (When using bottled juice, fill 2-3 inches above eggs. Do not add water.) Add natural dye ingredients and 1-2 tablespoons vinegar per quart of water.
- Cover and bring to boil, reduce heat and simmer for 15-20 minutes.
- Carefully remove eggs with a slotted spoon and air dry.
Cold Bath Method
The process for cold dyeing is much the same as the hot method except the eggs and dyes are cooked separately.
- Simmer the dye ingredients (water, vinegar and dye matter) for 20-30 minutes or longer, until the dye reaches your desired shade.
- Allow the liquid to cool and submerge hard-boiled eggs in the dye for at least 30 minutes.
- Carefully remove eggs with a slotted spoon and air dry.
Notes, Tips & Techniques
Color variation
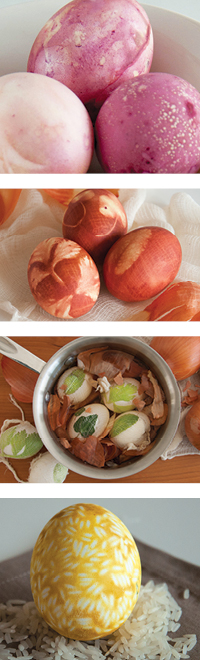
Colors may vary depending on steeping time and foods used to dye eggs.
Deeper colors
The longer the eggs stay in the dye, the deeper the color will be; leaving the eggs in the dye for several hours or overnight (in the refrigerator) is recommended for achieving deep colors. Allow the liquid and eggs to cool before refrigerating and ensure that the eggs are completely submerged in the dye. Eggs will be speckled if the dye matter remains in the liquid. For more uniform colors, remove the dye matter from the liquid, by straining the liquid through a coffee filter, before refrigerating.
Egg flavor
The flavor of the egg may change based on the dye, so if you plan to eat your dyed eggs, a shorter dye bath and fresh ingredients may be preferable.
Drying
Make a drying rack by cutting the bottom off an egg carton and turning it upside down.
Decorating
- Wrap onion skins around eggs, then wrap the entire egg with a cheese cloth square and secure it with string before placing the eggs in the dye.
- Wrap string or rubber bands around eggs before dyeing to create stripes (use rubber bands for cold dyeing only).
- Draw designs on hot, warm or cold hard-boiled eggs with crayons. When using hot or warm eggs, the crayon may melt slightly on contact with the egg (if eggs are hot, hold eggs with a potholder or rag to prevent finger burns). Crayon covered eggs should only be dyed in cold dyes as the crayon wax will melt in hot liquids.
- Gently wipe dry dyed eggs with vegetable oil to give eggs an added sheen.
You may also like
|
|
 |
 |